
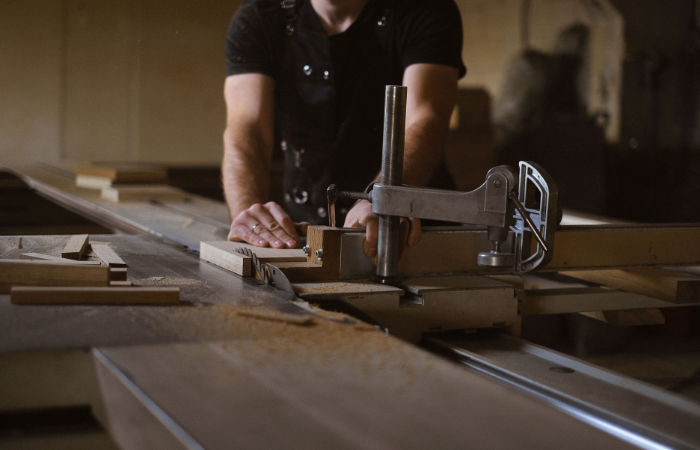
Most cabinets don't fail at the hinges. They fail at the edges.
A kitchen can look perfect on install day and start showing weaknesses within a year. Doors sit slightly crooked, a drawer front won't line up with its neighbour, and the edge strip under the sink starts to lift. In most cases, the problem was built in long before assembly, at the cutting and edging stage.
Cabinet cutting and edging is the least glamorous part of joinery and one of the most important. It decides how well panels fit together, how clean the finished cabinet looks and how long it stands up to moisture, heat and daily use. If you're planning new cabinetry, ordering flat pack panels or comparing cut and edge services, knowing what good work looks like puts you in control of the result.
What Is Cabinet Cutting and Edging
Cabinet cutting and edging is a two-part panel process. Large sheets of board such as melamine, MDF, particleboard or plywood are cut to precise dimensions, then the exposed edges are sealed with a thin strip of PVC, ABS or timber veneer. The result is a set of finished components ready for assembly.
Cutting covers more than sizing. A professional service will usually drill hinge cups, shelf pin holes and assembly points at the same time, so every panel arrives pre-drilled for hardware.
Edging, also called edge banding, applies a strip of material to each visible or vulnerable edge. The strip is bonded, trimmed flush with the panel faces and finished so it feels smooth to touch.
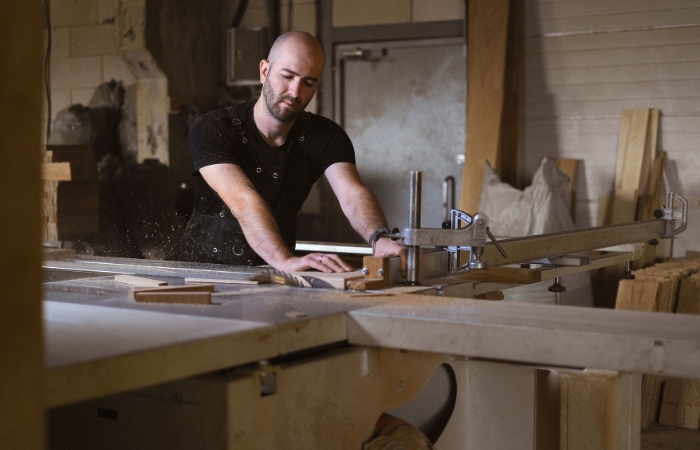
Think of a melamine board like a sealed envelope. The faces are protected, but the moment you cut it, you've opened it. Edge banding is what seals it again.
The board and surface you choose also shape the final look. If you're still deciding on finishes, the differences between laminate and veneer cabinets are worth understanding before you finalise panel specs.
Why Cutting and Edging Matter for Cabinet Quality
Cutting and edging matter because they control fit, moisture resistance and finish. Accurate cuts keep carcasses square so doors and drawers align and run smoothly. Well-bonded edges stop water from reaching the board core, which is where swelling starts. Together, they decide whether a cabinet still looks and works like new after years of daily use.
Fit and Alignment
A single cabinet is made from several panels. If each one is off by even a millimetre, those errors add up across the carcass.
The result is a box that isn't quite square. Doors sit unevenly, gaps between drawer fronts vary, and hinges get pushed to the limit of their adjustment just to make things look right.
Drawer runners are even less forgiving. They need parallel sides to run smoothly, and a small width error can make a drawer stiff or noisy from day one.
Precision isn't about perfectionism. It's about building a cabinet that doesn't need constant adjusting.
Moisture Resistance
Particleboard and MDF are made from compressed timber fibres. When water reaches the raw core, the fibres expand, and the board swells. Once that happens, it doesn't shrink back.
The edge band and its bond are the main barrier against this. A strip that's poorly glued, has gaps at the corners or doesn't fully cover the edge gives moisture a way in.
This is why edging quality is critical in wet and humid areas like bathroom vanities and laundry cabinets, and around sinks and dishwashers in the kitchen.
Appearance and Finish
Poor cutting shows up as chipped laminate along the cut line. Poor edging shows up as dark glue lines, overhanging strips or sharp corners that catch clothing and skin.
These details are small individually but obvious in a finished room. On a set of kitchen cabinets, you'll see and touch dozens of edges every day, so they need to be clean and consistent.
How Precision Panel Cutting Works
Precision panel cutting uses machinery designed to cut large sheets to exact measurements with minimal chipping. The main methods are CNC routers, panel saws and handheld saws, and each delivers a different level of accuracy and edge quality.
| Cutting Method | Accuracy | Edge Quality | Best For |
|---|---|---|---|
| CNC router | Very high | Clean, consistent | Full cabinet jobs, drilling, repeat runs |
| Sliding or beam panel saw | High | Clean with scoring blade | Straight cuts, high volume |
| Track saw | Moderate to high | Good with fine blade | Small jobs, onsite adjustments |
| Handheld circular saw | Variable | Prone to chipping | Rough cuts only |
CNC Cutting and Nesting
A CNC (computer numerical control) router follows a digital cutting program. Once the panel sizes are entered, the machine cuts, drills and routes each part to the same measurements every time.
Most CNC setups use nesting software. It arranges all the panels on each sheet to reduce offcuts, which lowers material waste and cost on larger jobs.
Panel Saws and Scoring Blades
Panel saws are the traditional workhorse of joinery shops. Many use a small scoring blade that cuts a shallow groove just ahead of the main blade, which helps prevent melamine and laminate from chipping on the underside.
Handheld Tools
Home workshops can produce good results with the right technique, but consistency across dozens of panels is hard to achieve by hand. If you're weighing up doing it yourself, the tools and techniques involved are covered in detail in cutting and edging for DIYers.
How Edge Banding Works
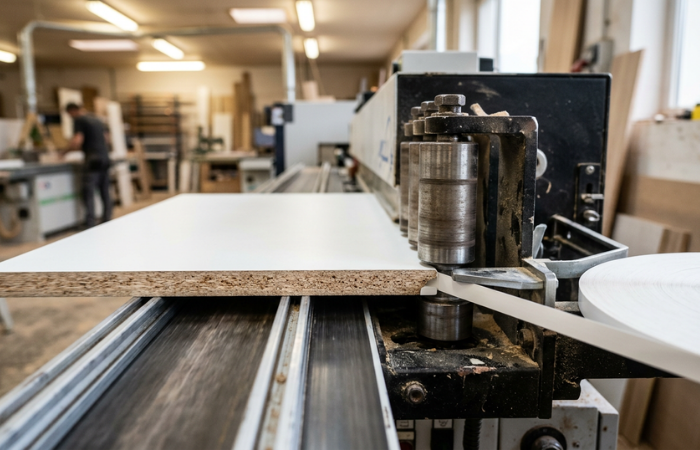
Edge banding works by bonding a thin strip of material to a panel's raw edge, then trimming and finishing it flush with the surface. Commercial edge banders complete the entire sequence in one pass, which produces a tighter, more consistent bond than manual application.
A typical machine sequence looks like this.
- Pre-milling. A cutter skims the panel edge to remove any small chips from cutting and leave a fresh, square surface.
- Bonding. Adhesive is applied, or a pre-coated layer on the edging is activated with heat.
- Pressing. Rollers press the strip firmly against the edge while the bond sets.
- End trimming. The strip is cut flush at each end of the panel.
- Flush trimming. Top and bottom overhang is removed so the strip sits level with the panel faces.
- Scraping and buffing. Corners are lightly radiused and the edge is polished to remove marks.
Hot Air Edge Banding
Traditional edge banding uses hot-melt glue, which can leave a visible dark line where the strip meets the panel. Hot air technology works differently. It uses heated air to activate a functional layer already on the back of the edging, which is designed to produce a near-invisible join.
A tighter join isn't just about looks. Fewer gaps along the bond line means fewer entry points for moisture and grime.
Comparing Edge Banding Materials
The edging material you choose has as much impact on durability as the bond itself. Here's how the common options compare for cabinet work.
| Edging Material | Impact Resistance | Moisture Resistance | Best For |
|---|---|---|---|
| ABS | High | High | Kitchens, laundries, trade work |
| PVC | High | High | High-traffic and wet areas |
| Timber veneer | Moderate | Low unless sealed | Furniture and feature pieces |
| Melamine paper | Low | Low | Low-wear internal panels |
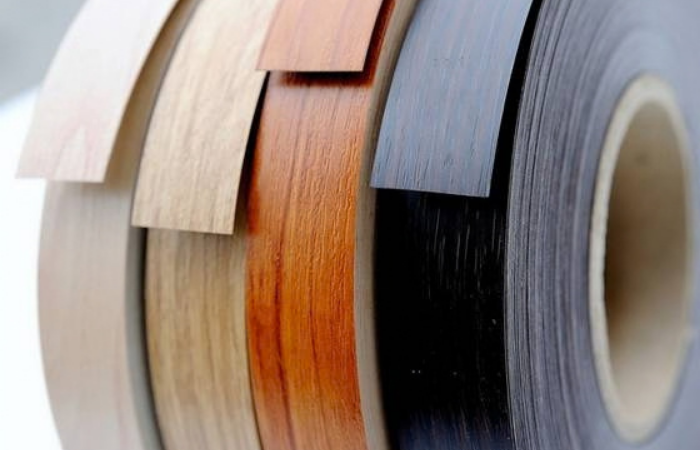
ABS and PVC perform similarly in daily use. ABS is chlorine-free and easier to recycle, while PVC is slightly more flexible, which helps on tighter shapes.
Timber veneer suits pieces where a natural look matters, such as custom furniture or feature units, but it needs a protective finish to handle moisture.
Colour matching is the final piece. A good edging supplier will match the strip to your board's colour and texture, so edges blend in rather than stand out.
The Cabinet Cutting and Edging Process Step by Step
Whether you're a trade professional or renovating your own home, the process follows the same basic path from plan to finished panels.
- Measure and design. Confirm the space, cabinet sizes, door style and hardware before any panel sizes are set.
- Choose board and edging. Select the board type, thickness, colour and edging material for each part of the job.
- Prepare the cutting list. List every panel with its dimensions, quantity, grain direction, edges to band and any drilling.
- Optimise the layout. Panels are nested on each sheet to reduce waste and keep grain patterns consistent.
- Cut and drill. Panels are cut to size and drilled for hinges, shelf pins and fixings.
- Edge band. Each specified edge is banded, trimmed and finished.
- Inspect and label. Panels are checked for size and edge quality, then labelled so assembly is straightforward.
- Assemble and install. Labelled panels go together in order, whether in the workshop or on site.
Most problems trace back to step three. A missing edge note, the wrong grain direction, or a measurement written down incorrectly will be cut exactly as listed. Double-check your cutting list before it goes to production.
Signs of Poor Cutting and Edging
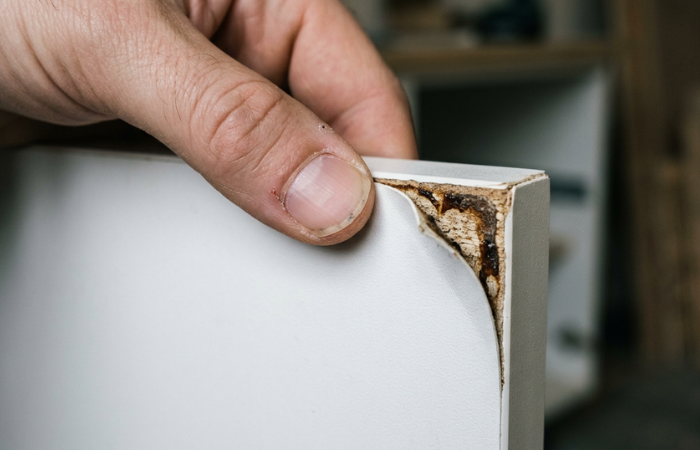
You don't need special tools to spot poor workmanship. Check for these issues when your panels or cabinets arrive.
- Chipped faces. Look for small chips in the laminate along cut edges, especially on dark or gloss boards.
- Visible glue lines. A thick dark line between the edging and the panel face points to a weak or rushed bond.
- Lifting or loose edges. Run a fingernail along the join. Any movement or gap is a future moisture problem.
- Overhang or sharp corners. Edging should sit flush with both faces and feel smooth at the corners.
- Out-of-square panels. Measure a carcass corner to corner in both directions. The two diagonals should match.
- Colour mismatch. Edging that's a shade off will stand out once the cabinets are installed.
If your existing cabinets already show swelling or lifting edges, it's worth weighing whether to replace or reface your kitchen cabinets before the damage spreads.
Frequently Asked Questions
Do all cabinet panel edges need edge banding?
Not always. Visible edges and any edge exposed to moisture should always be banded. Edges hidden inside a carcass or pushed against a wall are sometimes left raw to save cost, but anything near a sink, dishwasher or laundry tub is best sealed.
What thickness of edge banding is best for cabinets?
A 1mm edge is a common choice for carcasses, shelves and doors because it balances durability with a clean look. Thinner strips around 0.4mm suit low-wear internal parts, while 2mm edging is often used where panels take regular knocks, such as commercial fit-outs.
How long does cabinet cutting and edging take?
Timing depends on job size, board availability and how complete your cutting list is. Many standard jobs are finished within a few days to a week. Larger production runs or special-order boards can take longer, so confirm lead times when you request a quote.
Can you order cutting and edging without a full cabinet package?
Yes. Many cut and edge services process panels to your own cutting list, which suits cabinet makers, builders, shopfitters and DIY renovators. Some also supply hinges, drawer systems and handles, and can label or assemble flat pack panels for you.
Clean Edges Start With the Right Cut and Edge Partner
Every cabinet you open, close and wipe down relies on work done before assembly. Accurate cuts keep it square. Sealed, well-bonded edges keep moisture out. Get both right, and your cabinets hold their fit and finish for years.
Magri Cabinets offers a complete cutting and edging service across Melbourne, with CNC panel cutting, vertical and horizontal drilling and cutting list optimisation. Edge banding is available in PVC, ABS and veneer using hot air technology, with colour matching, hardware supply, labelled panels and pickup or delivery options.
We also build complete custom wardrobes, TV cabinets and kitchens, so cabinetry experience informs every panel it processes. Whether you need a one-off flat pack or a high-volume production run, the focus stays on accuracy and clean, durable edges.
Contact us to get a free quote on your cutting and edging project and have your panels arrive ready to assemble.


Magri Cabinets Assistant
Online • Craftsman Expert